End to End Machine Learning project implementation (Part 1)
Introduction
This is an end-to-end Machine Learning project starting from setting up the project on GitHub to finally deploying on the cloud platform (AWS or Azure). It will cover all the steps and the project’s different parts in the form of a series of subsequent blogs. This is part of a learning journey that I am sharing via blogs to understand every block of the project so that I can build my own ML projects or applications later.
GitHub and Project Structure setup
To start with any project we first need to understand the Git and GitHub commands to keep the project version updated every time we work on it and also showcase it as proof of work.
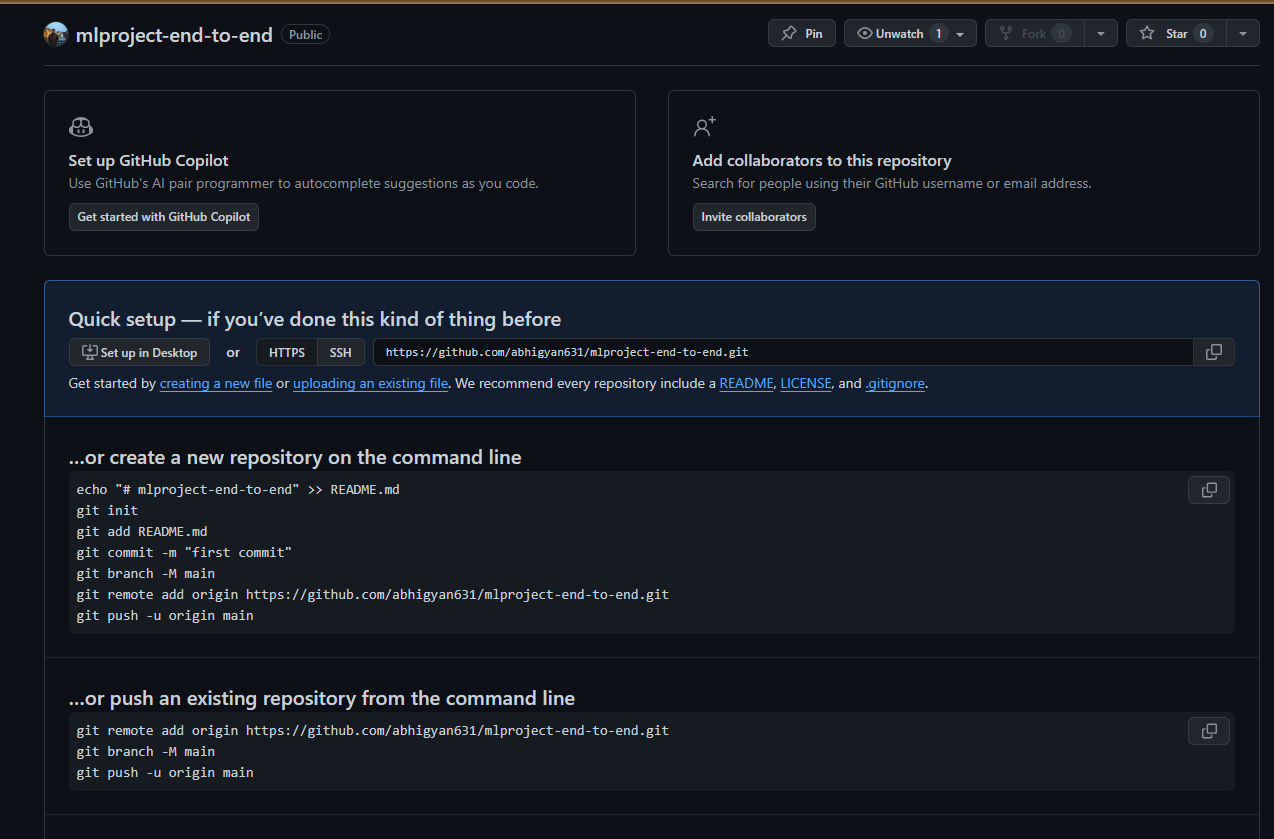
- Create a new repository (mlproject-end-to-end)
We need to create a GitHub account first by clicking on the top right option. We then name the repository, keep it public, and proceed forward with the next step.

After the repository is created the below section will appear, better to keep a screenshot of this for future reference when updating the codebase on GitHub. While we are working on our local PC (VS Code, Jupyter Lab, etc) we can use the commands to update from our PC to the GitHub repository.
- Create a new environment (on VS code or jupyter lab)
Now that the repository is created, we can create a new Python environment. The Python environment is primarily created for a project to avoid any conflicts or dependencies between various libraries that are already installed in the system Python. We can have an isolated Python without affecting the system Python to work with. The command to create the environment is as follows.
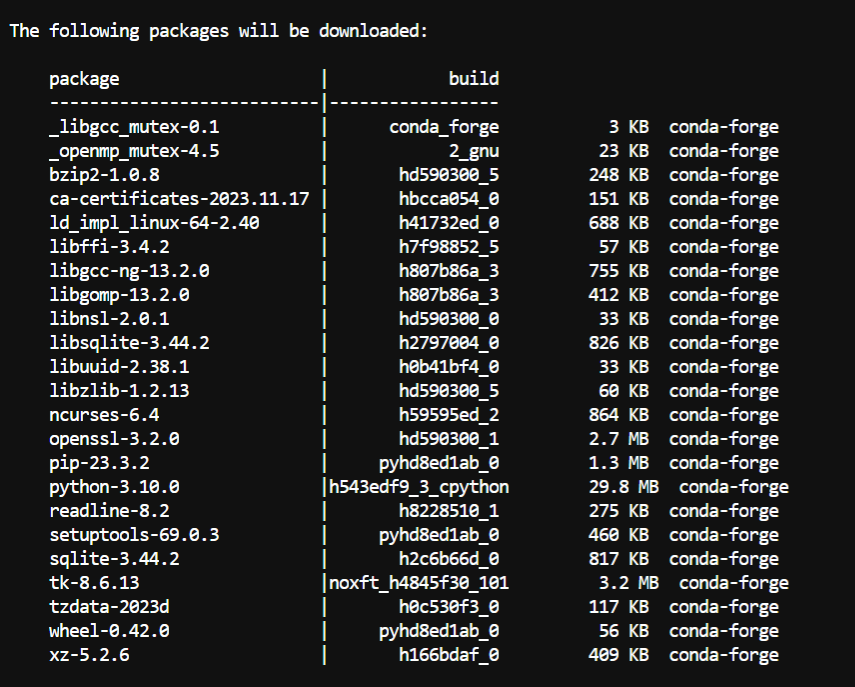
conda create -p myenv1 python==3.10 -yIf the conda command does not work on bash, we can also create an environment using the pip command. The name of the environment is myenv1 and the Python version used is 3.10.
While creating the environment the following packages will be installed as a part of the environment.
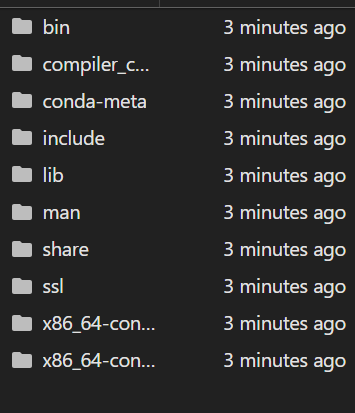
After the environment myenv1 is created, we can check that a folder named myenv1 is created and the following contents are present inside it.
Then we activate the environment named myenv1 as shown below.
conda activate "myenv1"
- Clone the new repository
After the environment is created let’s do some git operations to update the contents in the GitHub repository. We already have the list of commands, so we will implement them step by step. But first, let’s create a README.md file containing the text (#End to End Machine Learning Project). We can put anything else but it is better to keep it relevant to the project. The main purpose of the README.md file is to have the documentation of the project e.g. steps of the project, the problem we are solving by doing the project, and so on.
For now, we will just check if the GitHub is getting updated after we create the README.md file.
The steps are as follows.
git init
git add README.md
git commit -m "first commit"
git status
git branch -M main
git remote add origin https://github.com/abhigyan631/mlproject-end-to-end.git
git remote -v
git push -u origin main
We must follow each step for a better understanding of the Git commands. git init: Initializes a new Git repository in the current directory
git add README.md: Prepares the README.md file for the next commit.
git commit -m “first commit”: Commits the staged changes to the local repository, creating a snapshot of the project’s current state. The -m flag adds a message to the commit e.g. “first commit” in this case of committing the files that we have or are created in the first phase of the project. We will continue doing this every time we commit but with a different message for different purposes.
git status: Shows the current status of the working tree, including which files are staged for commit, the untracked files, and all the branches we are working on.
git branch -M main: Renames the current branch to main for having the main branch.
git remote add origin https://github.com/abhigyan631/mlproject-end-to-end: Connects our local repository to a remote repository on GitHub named origin. This helps to push the changes to the remote repository for sharing and open-source collaborations.
git remote -v: Lists the remote repositories that are connected to the local repository.
git push -u origin main: Pushes the commits in our local main branch to the remote origin repository, specifically to its main branch. The -u flag sets it as the upstream branch, so future pushes can be done with a simple git push.
We also create a .gitignore file in GitHub so as not to update the irrelevant files.
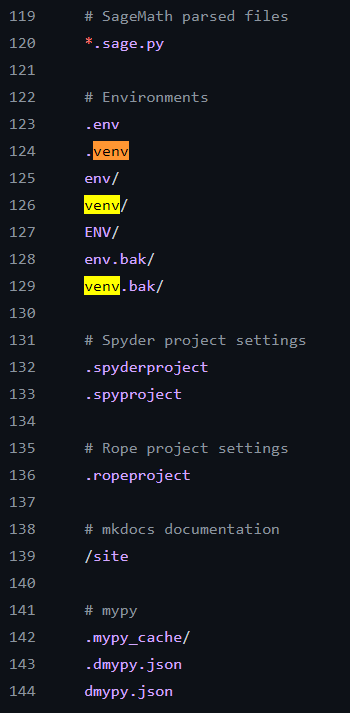
This is a screenshot of the .gitignore file. While creating it, we selected Python so all the irrelevant files wouldn’t be used for operation.
Now we update the GitHub again.
- Setting up the project
Next, we create setup.py file and requirements.txt (containing names of the relevant libraries we will be using). The setup.py file is responsible for setting up the environment for project creation e.g. having a function to use the requirements.txt for installing the relevant packages.
We also create the requirements.txt file that has the relevant packages like pandas, numpy, scikit-learn, matplotlib, seaborn, etc. for installation so we do not have to install the individual package whenever needed, we can just write the names in the requirements.txt file and its done.
Then we run the command below to install the packages.
pip install -r requirements.txt- Project Structure, Logging And Exception Handling
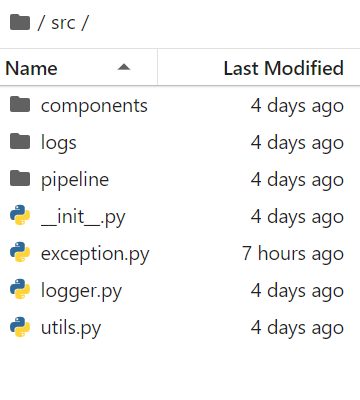
The src folder is created (__init__.py is created inside of it) and the package is built. There are also other folders like components, logs, and pipeline inside of the src folder.
The exception.py file is created to raise any exceptions or errors when needed, the logger.py file is created for any logs (and they are stored in the logs folder) like if we are training the machine learning model or compiling any file or any operation we do, it’s just to track our work.
We can run the logger.py and exception.py for just understanding.
python logger.py
python exception.py
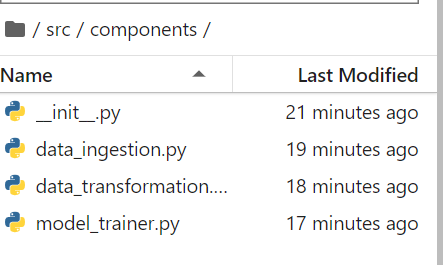
We also create a components folder (inside the src folder) and then create the python files __init__.py, data_ingestion.py, data_transformation.py, model_trainer.py. We will use them in the next parts for data ingestion and data preparation, data transformation, and model training.
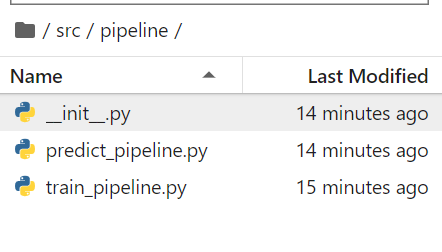
We also create a pipeline folder (inside the src folder). Create the python files __init__.py, train_pipeline.py, and predict_pipeline.py. Again, the files train_pipline.py will be used later so these are created for understanding the project structure.
Conclusion
We just created a Project structure and used GitHub commands to update into a new GitHub repository. The project structure almost remains the same for any end-to-end Machine Learning or Deep Learning project so we must understand it very well and keep this project structure as a future reference.
In the next part we will check the Problem statement, do the Exploratory Data Analysis (EDA), and Model Training.
Stay tuned for the next part and follow me here and say hi.